Droplets Digitalocean, we will create a droplet in the digital ocean account. If you are new and working for the first time with the digital ocean server that time the first question that will come to your mind is how to create a droplet or instance in the digital ocean account. The instance or droplet is both similar words there is no major difference from each other.
In this post, we will create a droplet in the digital ocean account. In the process of it, I made it very easy for some steps. You just follow the step image, then after you will create it very easily.
We will install the Linux ubuntu 20.04 server with the creation of this droplet. So let's start to create a droplet with the phpMyadmin. I am selecting phpMyadmin from the marketing place it's free. if you don't want then ignore it.
Step 1. Create A Project
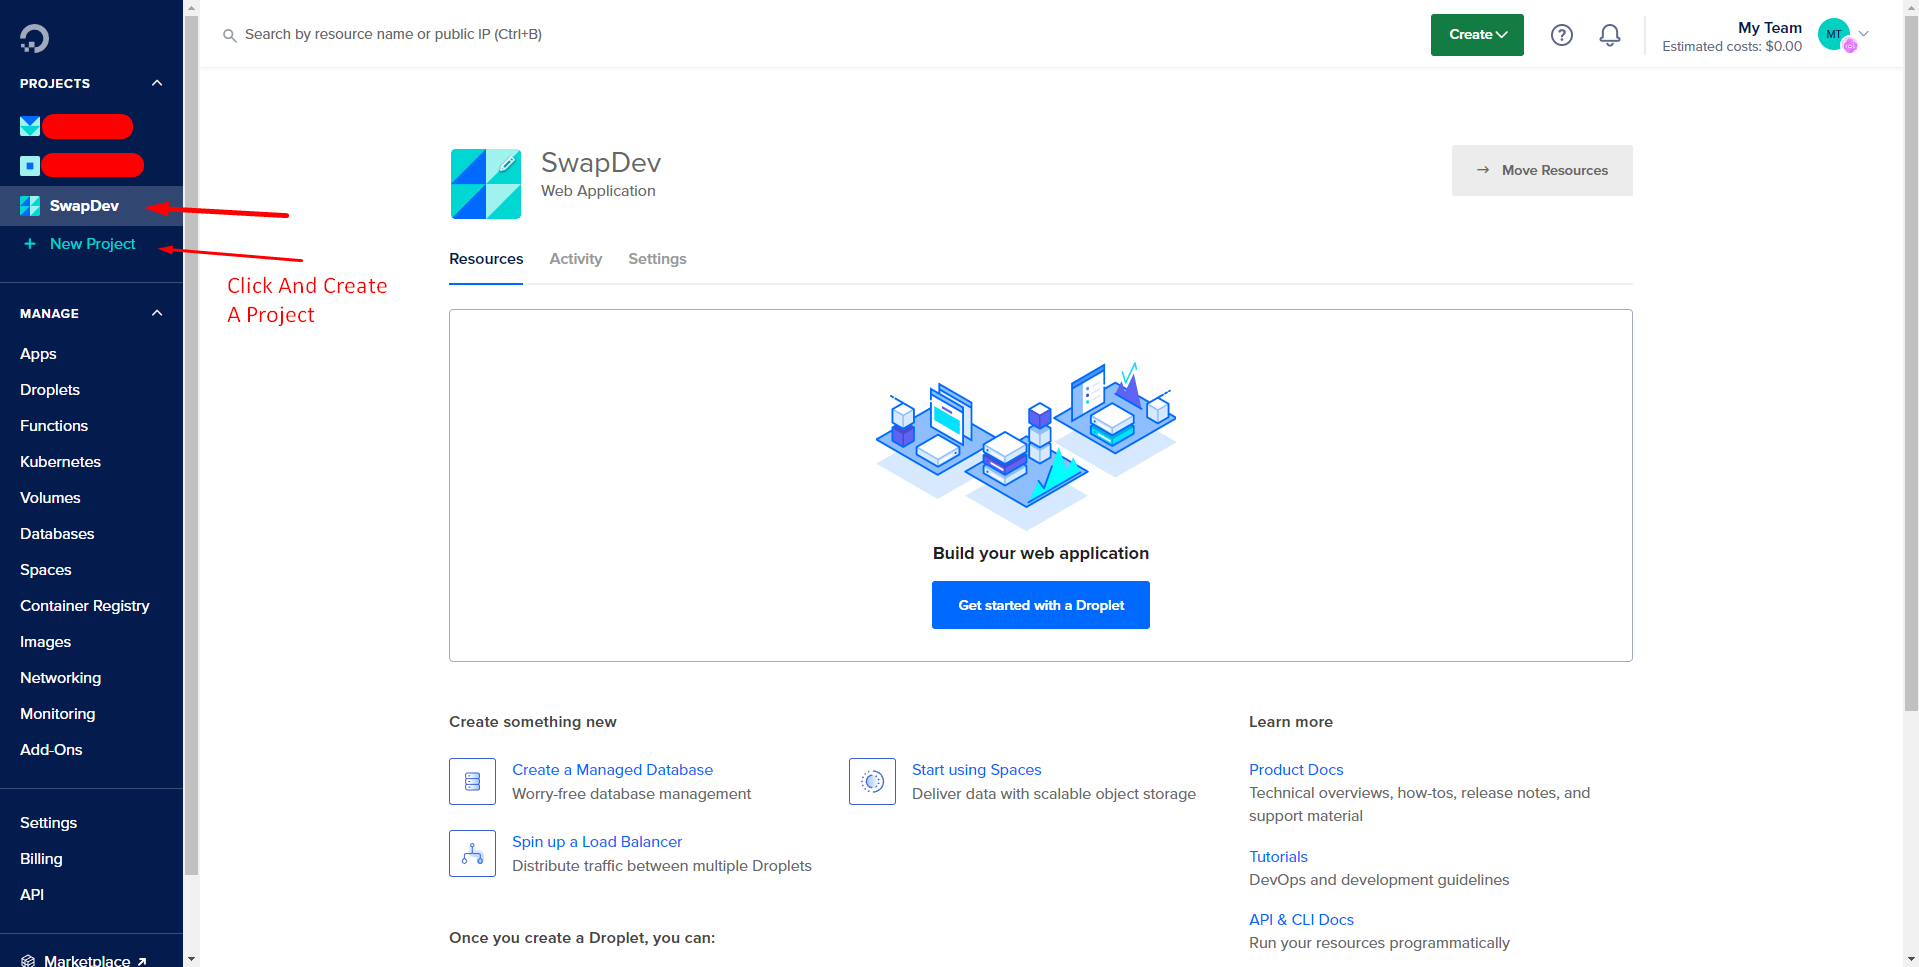
In this step, we will create a project, Click on "New Project" give the new project name and create a new project. Follow the below given image.
Step 2. Goto Droplet Option
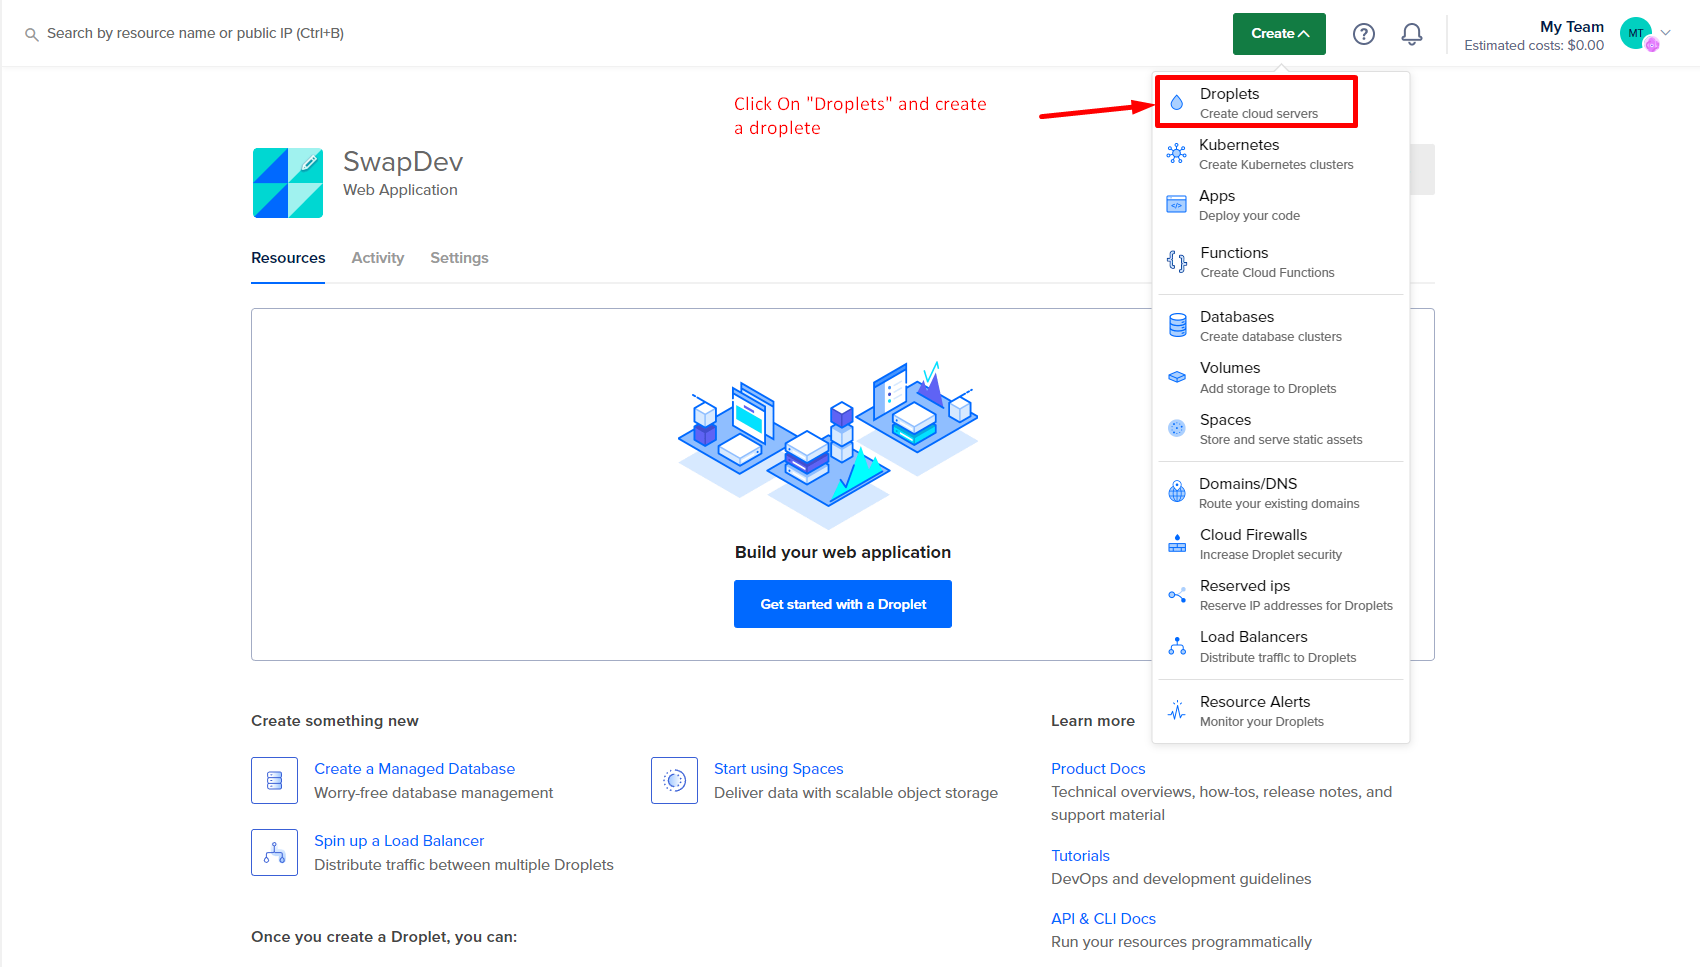
After creating a new project, There will be a create button option you will see at the top of the created project, Click on the "Create" button, Now you can see the "Droplet" option, click on the "Droplets".
Step 3. Select Server Datacenter
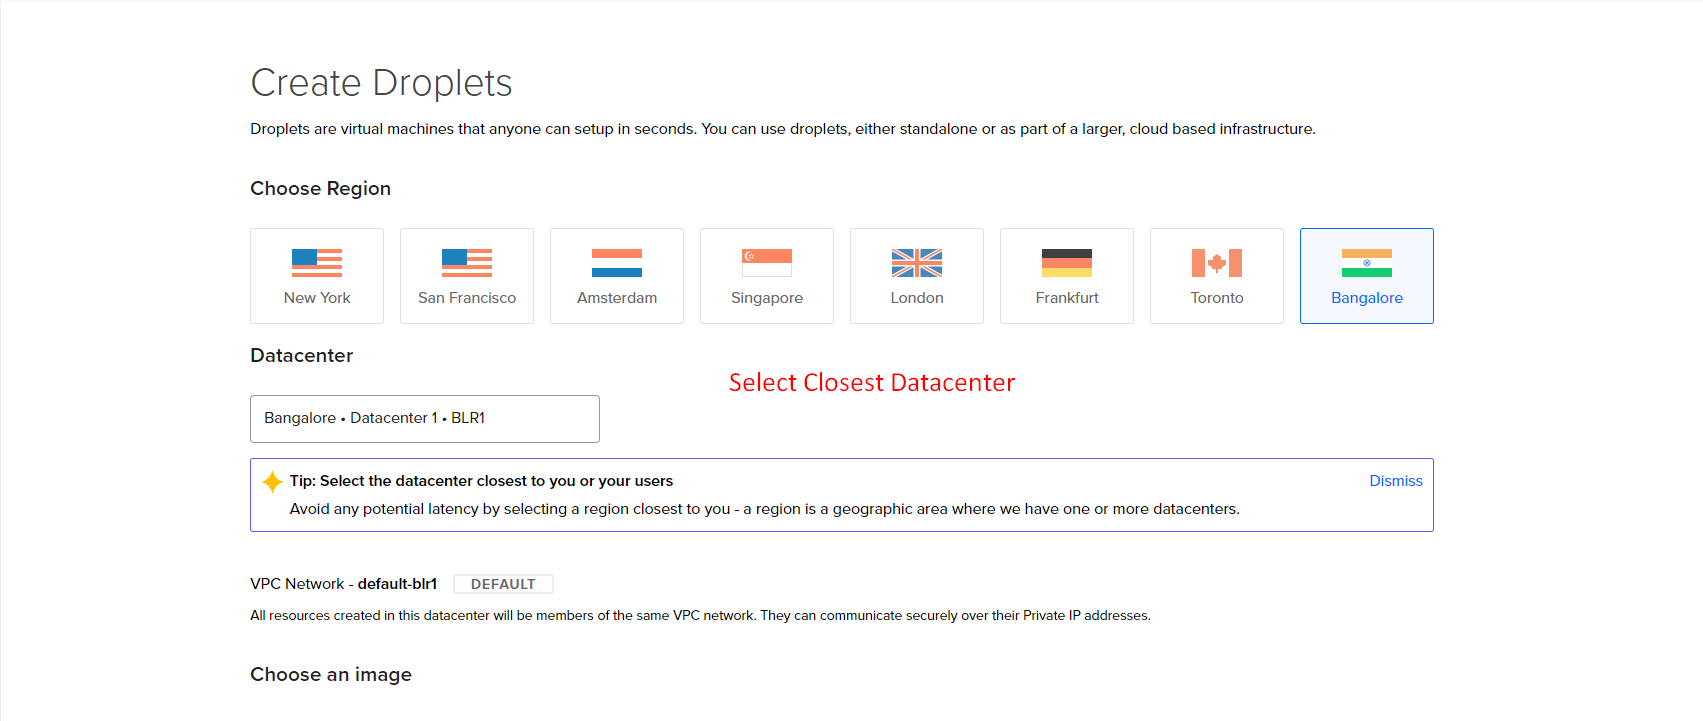
Now, they will ask to select "Datacenter" for the creating droplet, You will select your user's nearest datacenter. You can also select any datacenter according to your choice.
Step 4. Add phpMyadmin From Market Place
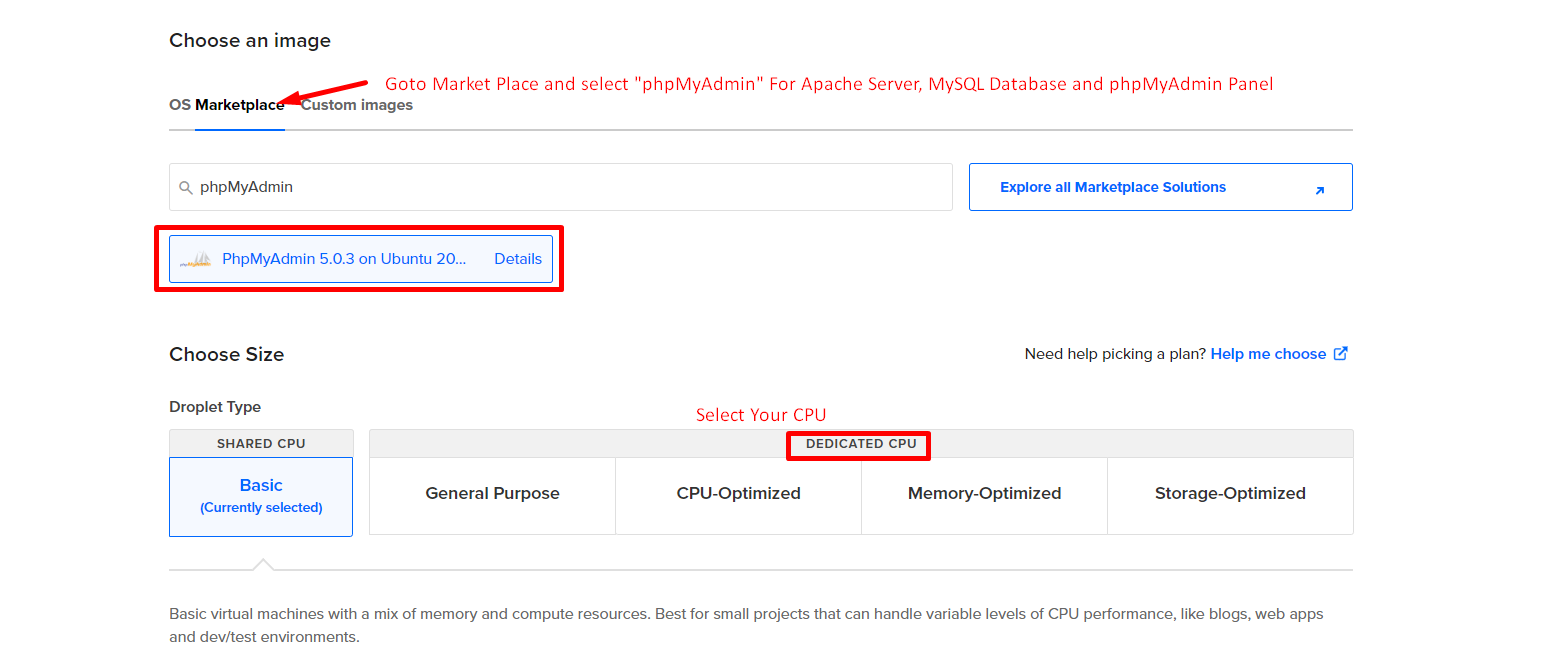
If you want to add "apache", "MYSQL", or "phpMyadmin". include with the droplet you can go to the market option and select search for the phpMyadmin and select. So when you create a droplet, they will include it also.
Step 5. Select Plane & Add Authentication
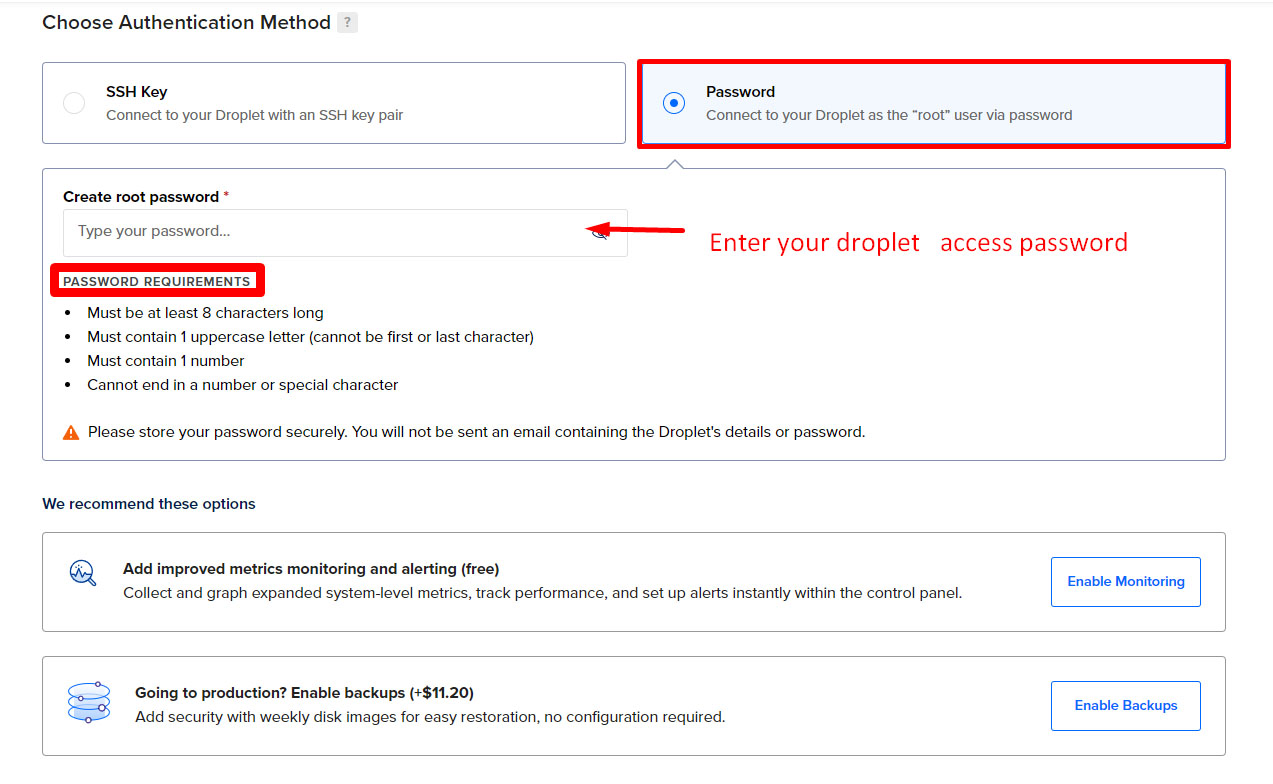
Select your plane according to your website traffic and load. The higher you select CPU the higher your plane paid. After selecting your plane add select password option. The password option for the authentication of your droplet from the and third-party access. This password will be your droplet access password.

Step 6. Enter Your Droplate Password
Your password must fill up all the password requirements. Make your password very stored by following their instruction.
Step 7. Select Additional Services & Add Droplet Name & Tag & Project
If you wish to take any additional services with the droplet you can select them. Some services are free based on your selected plane and some services are paid, by taking the services you need to pay an extra charge even the droplet charge.

Step 8. Droplet Created
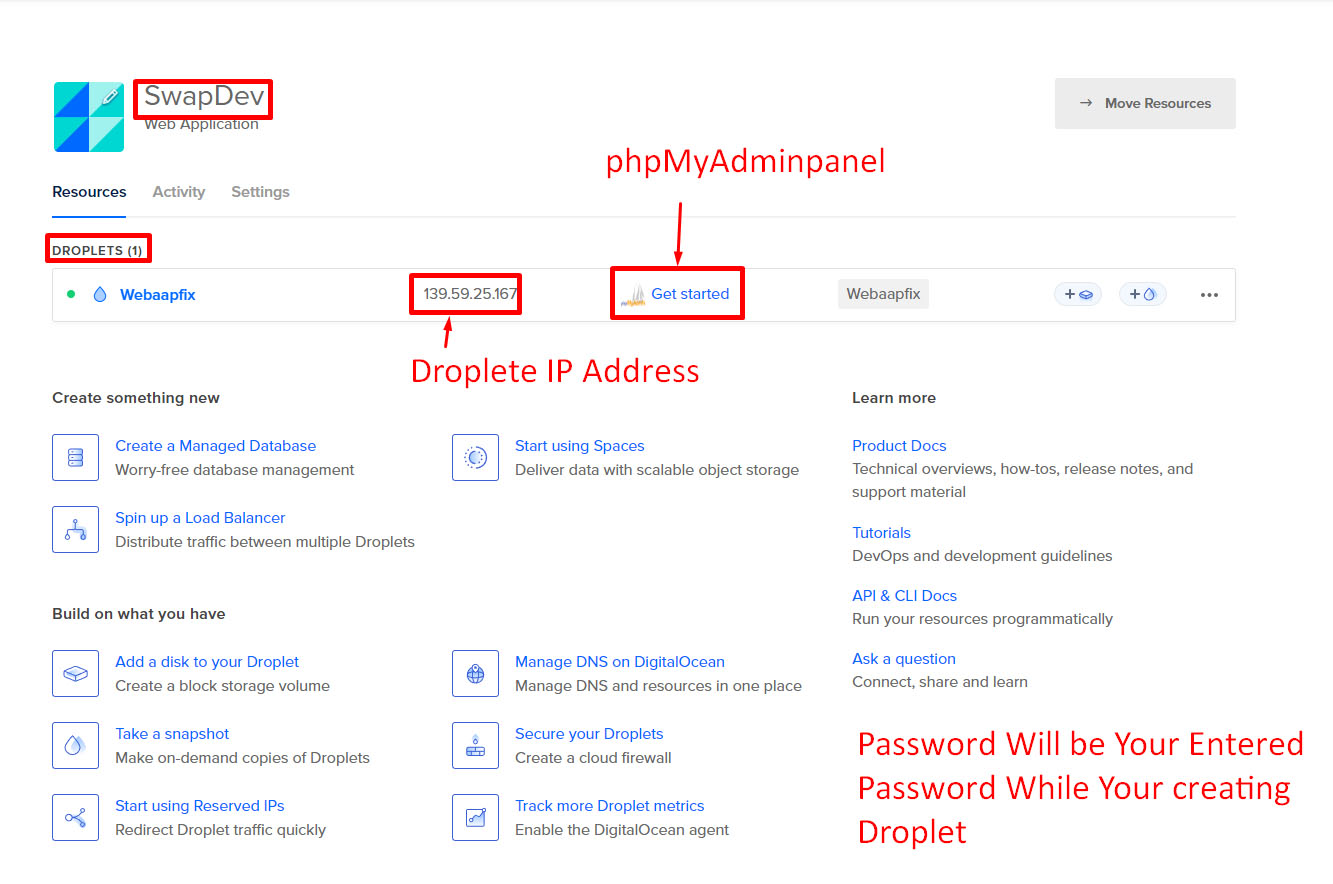
Now your droplet is ready to use, There will be your IP address, enter it in your browser it will open your default index file. besides the IP address phpMyadmin panel option, click on it and open your PHP admin panel. You can create multiple droplets in a single project.
We always thanks to you for reading our blogs.

Dharmesh Chauhan
(Swapinfoway Founder)Hello Sir, We are brothers origin from Gujarat India, Fullstack developers working together since 2016. We have lots of skills in web development in different technologies here I mention PHP, Laravel, Javascript, Vuejs, Ajax, API, Payment Gateway Integration, Database, HTML5, CSS3, and Server Administration. So you need our service Please Contact Us

Haresh Chauhan
(Co-Founder)We Are Also Recommending You :
- cPanel Cron Job Example With Demo
- ERROR: database "laravel" is being accessed by other users DETAIL: There is 1 other session using the database.
- Creating Droplets Digitalocean With phpMyadmin
- Error :unable to connect to server connection to the server at port 5432 failed timeout expired
- How To Install MongoDB In Ubuntu
- Install PostgreSQL Ubuntu 20.04 With pgAdmin4
- How to See Pgsql Database List in Ubuntu
- Command SSH key generate in ubuntu server
