
Laravel-Mix Is a powerful module tool that prepares javascript and bundled assets for the browser. This mix provides mix javascript framework Vue.js and Laravel.
In this tutorial, we will learn how to install the laravel Vue js project mix asset and use Vuej.js frontend in the laravel project.
Laravel-Mix target the 80% of use case, you just need to install npm in laravel and just fix the webpackmix file and you can easy to run the laravel project in your system.
Before you start this post you must little knowledge about Laravel PHP framework and Vue.js javascript framework. that's it. I hope you know already. Well, we start the next process.
Tought Laravel-Mix originally mad for the laravel project. if of course, you can use any type of application.
Be install the laravel project and start installing the project.
In this example Mix used for Laravel 8 framework. So please Keep in mind.
Step: 1 Clone Laravel Project
By using the given command you can clone the laravel 8 projects in your system.
So please open your terminal and fire the below command.
composer create-project laravel/laravel:^8.0 example-app
Step: 2 Go To Directory
Reach in your project directory, Where you installed your project. In my case project name is example-app that's why I run the below command, if you change your project name please enter that one.
cd /example-app
Step: 3 Laravel UI Composer Install
Using this given command you will be able you generate Vue UI easily, So please run the below-given command that is UI Dependency, that will install composer packaged in your laravel project.
composer require laravel/ui
Step: 4 Generate Vue UI
Using the below-given command you will generate Vue basic interface in the laravel project, So please below-given command in you laravel project directory.
php artisan ui vue
Step: 5 NPM Install
Well! Now time to install node packages in laravel project,Vue dependency. So let's install npm in this project again please follow the below command. Once you run this command in your terminal you your laravel project directory. it will install node modules. Once installed you can see in your project node_modules.
npm install
Step: 6 Build Bundled
After installing npm time to build the bundle. Using below command, Will build bundle for Vue.
npm run dev
Once you run the above command you will see an interface like the below-given example.

Note: If you are not getting to run npm run dev and throwing some errors, while you enter npm run dev So you must need to install Vue-loder depedency.
Step:7 Install Dependency (Optional)
If npm run dev does Not work then please run the below command in your terminal. That will install a dependency for the Vue npm.
npm install vue-loader@^15.9.7 --save-dev --legacy-peer-deps
&&
npm run dev
Step: 8 Laravel Server Start
Run this below command this will run your laravel project in your local system.
PHP artisan serve
After the laravel project, you will see like below interface in your terminal.
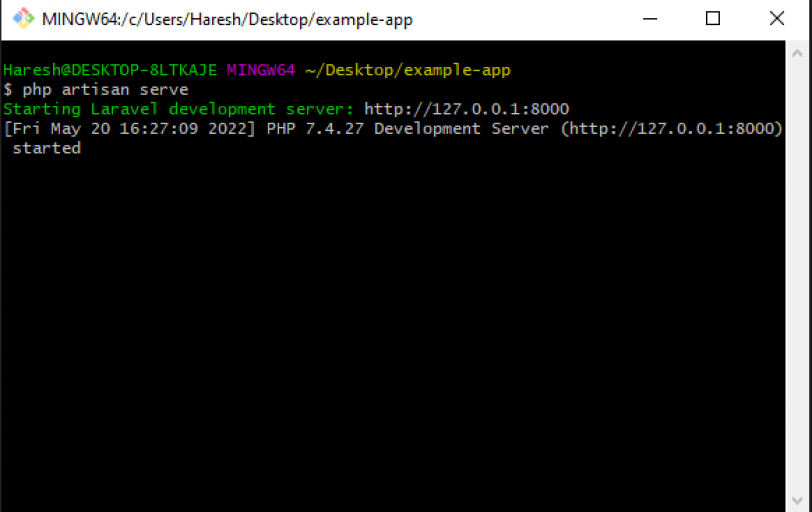
Now image above interface you will see your project.
Step: 9 My ExampleCompenent.vue
Installing UI in your project will create an example component file for little understanding.
resources/js/components/ExampleCompenent.vue
<template>
    <div class="container">
        <div class="row justify-content-center">
            <div class="col-md-8">
                <div class="card">
                    <div class="card-header">Example Component</div>

                    <div class="card-body">
                        I'm an example component.
                    </div>
                </div>
            </div>
        </div>
    </div>
</template>

<script>
    export default {
        mounted() {
            console.log('Component mounted.')
        }
    }
</script>
Step: 10 App.Js
This is your app.js file in the below-given root. In this file, all your components should be registered. As given in example example-compenent.
resources/js/app.js
/**
* First we will load all of this project's JavaScript dependencies which
* includes Vue and other libraries. It is a great starting point when
* building robust, powerful web applications using Vue and Laravel.
*/

require('./bootstrap');

window.Vue = require('vue').default;

/**
* The following block of code may be used to automatically register your
* Vue components. It will recursively scan this directory for the Vue
* components and automatically register them with their "basename".
*
* Eg. ./components/ExampleComponent.vue -> <example-component></example-component>
*/

// const files = require.context('./', true, /\.vue$/i)
// files.keys().map(key => Vue.component(key.split('/').pop().split('.')[0], files(key).default))

Vue.component('example-component', require('./components/ExampleComponent.vue').default);

/**
* Next, we will create a fresh Vue application instance and attach it to
* the page. Then, you may begin adding components to this application
* or customize the JavaScript scaffolding to fit your unique needs.
*/

const app = new Vue({
    el: '#app',
});
Step: 11 App.Js
This is your Bootstrap.js file in your below-given root.
resources/js/bootstrap.js
window._ = require('lodash');

try {
    require('bootstrap');
} catch (e) {}

/**
* We'll load the axios HTTP library which allows us to easily issue requests
* to our Laravel back-end. This library automatically handles sending the
* CSRF token as a header based on the value of the "XSRF" token cookie.
*/

window.axios = require('axios');

window.axios.defaults.headers.common['X-Requested-With'] = 'XMLHttpRequest';

/**
* Echo exposes an expressive API for subscribing to channels and listening
* for events that are broadcast by Laravel. Echo and event broadcasting
* allows your team to easily build robust real-time web applications.
*/

// import Echo from 'laravel-echo';

// window.Pusher = require('pusher-js');

// window.Echo = new Echo({
//     broadcaster: 'pusher',
//     key: process.env.MIX_PUSHER_APP_KEY,
//     cluster: process.env.MIX_PUSHER_APP_CLUSTER,
//     forceTLS: true
//
// });
Step: 12 Welcome.blade.php
This is your welcome blade file, In this file, you need to set up something like an example. engaged with a mixed asset. and id="app" in this div whole Vue application will append once you start developing in Vue component.
resources/views/welcome.blade.php
<!DOCTYPE html>
<html lang="en">
    <head>
        <meta charset="UTF-8">
        <meta name="viewport" content="width=device-width, initial-scale=1.0">
        <meta http-equiv="X-UA-Compatible" content="ie=edge">
        <link rel="stylesheet" href="{{ mix('/css/app.css') }}">
        <title>Laravel Mix</title>
    </head>
    <body>
        <div id="app">
            <example-component><example-component/>
        </div>
        <script src="{{ mix('/js/app.js') }}"></script>
    </body>
</html>
Step: 13 Mix Asset Management
Check-in your project webpack.mix.js file in your project folder last file.
webpack.mix.js
const mix = require('laravel-mix');

/*
|--------------------------------------------------------------------------
| Mix Asset Management
|--------------------------------------------------------------------------
|
| Mix provides a clean, fluent API for defining some Webpack build steps
| for your Laravel application. By default, we are compiling the Sass
| file for the application as well as bundling up all the JS files.
|
*/

mix.js('resources/js/app.js', 'public/js')
    .vue()
    .sass('resources/sass/app.scss', 'public/css');
Thanks...
We always thanks to you for reading our blogs.

Dharmesh Chauhan
(Swapinfoway Founder)Hello Sir, We are brothers origin from Gujarat India, Fullstack developers working together since 2016. We have lots of skills in web development in different technologies here I mention PHP, Laravel, Javascript, Vuejs, Ajax, API, Payment Gateway Integration, Database, HTML5, CSS3, and Server Administration. So you need our service Please Contact Us

Haresh Chauhan
(Co-Founder)We Are Also Recommending You :
- Laravel 10 PDF Export Example With DomPDF
- Arr::add() | Laravel Helper Function
- How To Exchange Currency Rates In Laravel Example
- How To File Upload AWS s3 Bucket In Laravel 9
- Laravel Intervention Image
- Select2 ajax example
- Laravel Postcodes
- Laravel Database Based Dynamic Mail Configuration Set Example
- Non-static method Illuminate\Http\Request::method() should not be called statically
- What are accessors and mutators In Laravel